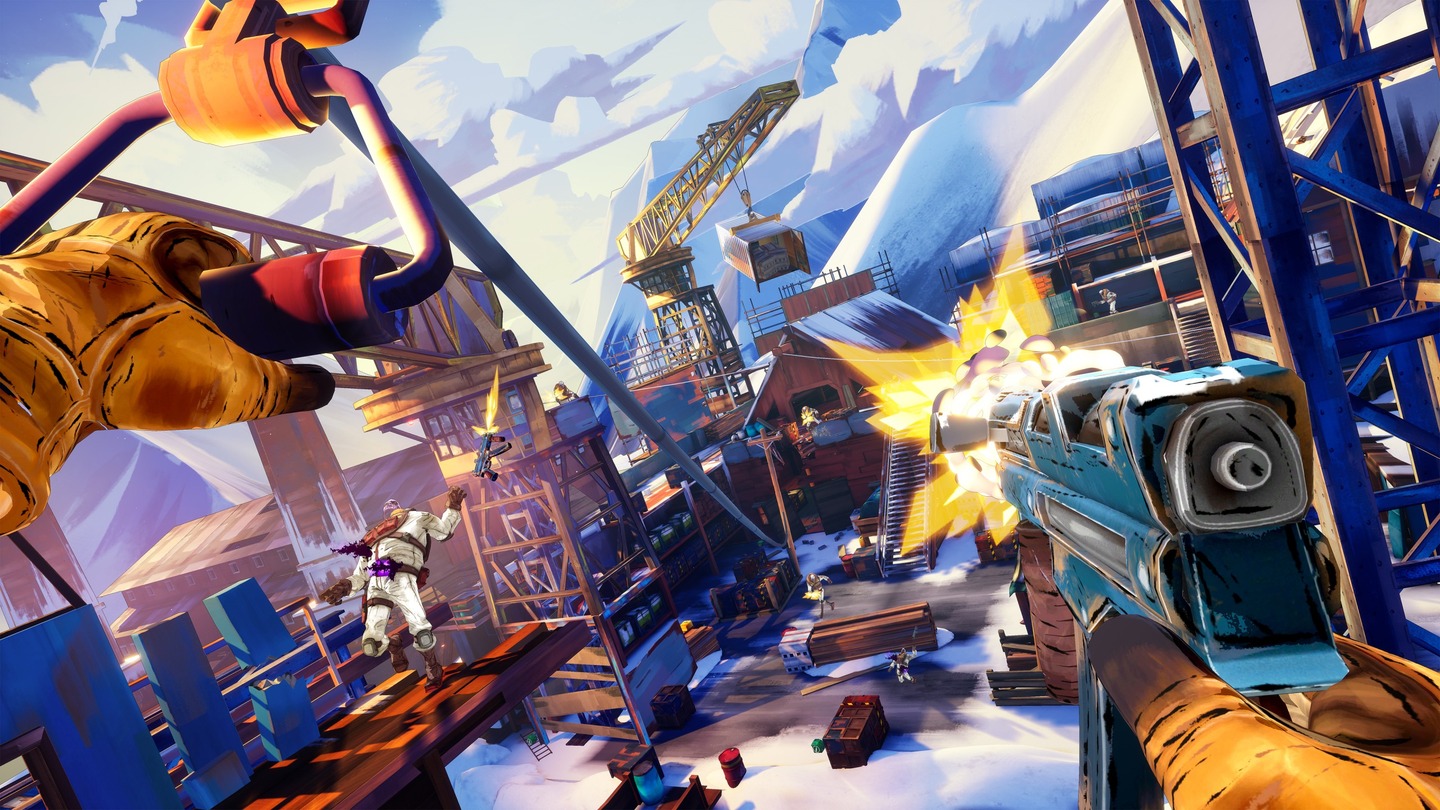
Fracked (Quest Port)
Project Info
The port of Fracked to Quest 2/3 was a very ambitious one primarily due to the small team size (~10 people at its largest), the limited timeframe for development (~3 months), and the fact that the game was designed first and foremost for PSVR 1.
My responsibilities morphed as the project progressed. Below is a list of responsibilities split into the different phases of the project.
Pre-production:#
- Identify the main areas of optimization work that would be required. What graphical features could be brought over and what features would need to be cut
- Initial performance profiling pass on Quest 2 to identify the worst-case views and areas
- Write-up of my findings from the pre-production investigation to hand off to the production team
Production:#
- Disable graphical features which would not be feasible on a mobile platform like Quest 2 (volumetric effects, heavy full screen FX like bloom, sobel outlines, sun flares etc.)
- Port of certain post FX via Vulkan subpasses (color grading, tonemapping, tinting, fade to black, etc.)
- Optimization of master materials (baking material effects to textures where possible)
- Optimization and cleanup of geometry
- Frequent performance profiling reruns
- Various gameplay bug & crash fixes
- PSO caching & implementation of Shader Compiling UI screen
Pre-Production + Profiling Process#
I was brought onto the project early on in order to help identify the bulk of the optimization work that would be required along with the people needed for said work.
I began with an initial performance profiling pass using OVR Metrics plus Unreal Insights and quickly identified that the game’s rendering pipeline was bottlenecked from very high draw calls (in the 1000+ draw call range). Meta’s official documentation suggests a 200-300 draw call range for Quest 2 for a medium simulation. With the help of Precomputed Visibility (PCV), Hierarchical LODs (HLODs) and Cull Distance Volumes (CDVs) we were able to reduce this number down to 400-700 draw calls.
With this, OVR Metrics still showed high GPU App Time with high GPU usage, indicating that the application was GPU limited. To further diagnose this I took several Render Doc captures from a few of the most expensive views in the game. The general capture statistics (draw calls, GPU render time) were recorded in a spreadsheet along with performance counters from the most expensive draw calls (instruction counts, texture reads, wave occupancy, etc.) to indicate what the most expensive materials/objects were in the scene.
My findings from this profiling pass was collated into a document that was used to help identify the resources that would be required to complete this port.
Production#
Memory Usage#
During my profiling the memory usage for the game never peaked above 2.5-2.6 GB which we found from Ghostbusters: Rise of The Ghost Lord is the maximum sweetspot for Quest 2. Therefore we kept things like the texture resolution the same as on the PSVR 1 version.
Graphical Effects#
After the team was formed from the findings of the pre-production, we began work on the bulk of the optimization. The most obvious place to start was disabling features that we knew would not be possible to replicate on Quest 2 at the 72fps native target such as volumetric effects, sun flares, bloom, full screen sobel outline filters, and other full screen post processing effects.
Running Render Doc captures also allowed me to view the frame’s complete render pipeline which highlighted additional passes that could be removed such as color LUT combine pass and GPU particle acceleration.
Post Processing#
Disabling all post processing for Fracked caused a lot of issues as the game heavily relies on post processing effects to hide transitions and set color palettes based on the level. One of the major responsibilities I was given was to try and bring over as many of the post processing effects as possible while keeping their costs low.
Thankfully, Vulkan provides the very useful concept of subpasses. Vulkan subpasses allow certain full screen pixel effects to execute on the GPU without having to leave tile memory or resolve any textures. The only caveat being the inability to access neighboring pixels (e.g. effects requiring convolution filters such as bloom would not be possible with this method). With this in mind, I was still able to implement a lot of the post processing effects used in Fracked such as:
- Color Tinting
- Fade to Black
- Grayscale
- Comfort Vignette
- Tonemapping & Color Grading (for Quest 3 only)
To implement these features, I had to heavily customize Unreal’s Mobile Subpass Post Processing pipeline to add all mentioned effects and hook them up into our game systems, along with removing features in there we were not using such as grain, color LUTs, etc.
Material Optimization#
The master materials contained a lot of features that could be baked out for Quest 2 such as tri-planar projections for distant mountains and snow deformations. We also reworked the materials to remove all depth resolves.
Pixel Overdraw#
With the open nature of the levels, there is a ton of overdraw in the game that was simply not possible to address within the short timespan of this port. Because of this, we made some optimizations to reduce the cost of the overdraw as much as possible such as:
- Disabling Anisotropic filtering for all textures except for those where the quality degradation would be noticeable (e.g. textures with readable text)
- Simplifying UE4’s base pass opaque pixel shader as much as possible
- Reducing the use of transparency
Transparency#
Fracked’s PSVR 1 version uses a lot of transparency in their battlefield intuition (enemy/object outlines) system, materials and particle FX.
The use of PCV in the project to reduce draw calls caused a lot of visible popping of large portions of the levels due to transparency (e.g. passing by transparent windows). Our solution was to simply remove as much transparency as possible by replacing them with either Masked or Opaque effects. This also allowed us to also use more aggressive PCV configurations.
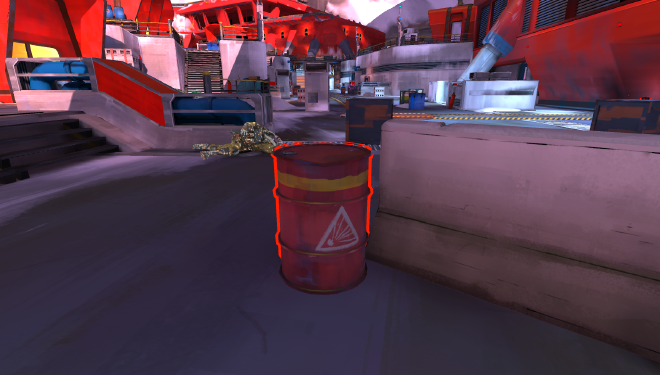
Battlefield Intuition (Outlines)#
Fracked has something known as Battlefield Intuition which is a system to outline enemies, enemy footsteps, and other combat interactables in the environment such as explosive barrels. In the original PSVR 1 version, this system was implemented using custom stencil buffers which would not be sensible on Quest 2 from a performance standpoint. Instead, we opted for an inferior but much cheaper system of rendering a duplicate of the object by with its vertices pushed out along their normals. The effect is not perfect but works well enough for the instances where it is used in the game.
Geometry Optimization#
Given the time constraints of the project, our solution to reduce geometry density was to create a small tool to perform automatic mesh reduction. This was done by passing the meshes through auto LOD generation and picking the appropriate LOD as the default for that mesh.
This solution worked well with only a few small issues such as visible seams at the edges of meshes which were segmented for level streaming purposes. These visible seams were trivial to fix manually.
Quest 3 Enhancements#
For the Quest 3 version, we had more GPU headroom to play with, allowing us to increase the shader complexity by enabling material normal calculations, roughness, higher quality reflections, and additional post processing effects such as tonemapping and color grading. We were also able to maintain a 1.5 render scale for most of the game.
The limited time we had meant we were unable to add additional graphical features to push the Quest 3 much further than this.
Gameplay Bug & Crash Fixes#
After the majority of the optimization work was done, I helped the rest of the team with gameplay bug and crash fixes that were reported by our QA team and logged in Jira.
PSO Caching#
The process of PSO caching was the same as for Ghostbusters: Rise of The Ghost Lord. Given that Fracked was a much smaller game with fewer permutations to consider, the PSO caching process went much smoother than for Ghostbusters. The tooling for the PSO cache generation from Ghostbusters was reused for Fracked to speed up the process.